OS Style settings view, Part 2

Now that you have a good looking GeneralSettingsView, we want some more settings pages and we want them to look MacOS alike, this is how we do it...

Introduction
In part one of OS Style Settings View we make a Generic Setting View with groups and nice toggles instead of checkboxes. But as I wrote in that post, there are the two most common ways to have a settings view is by either using a NavigationSplitView with only the details view and sidebar, or using TabBar. Now, lets implement the split view to make it a bit nicer.
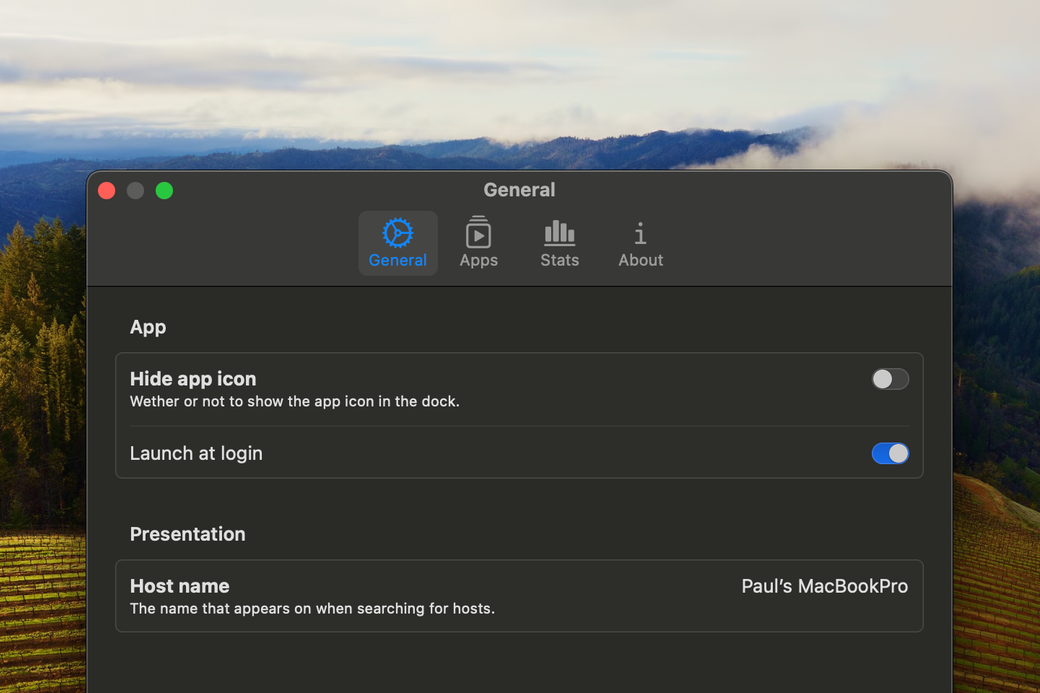
MacOS setting
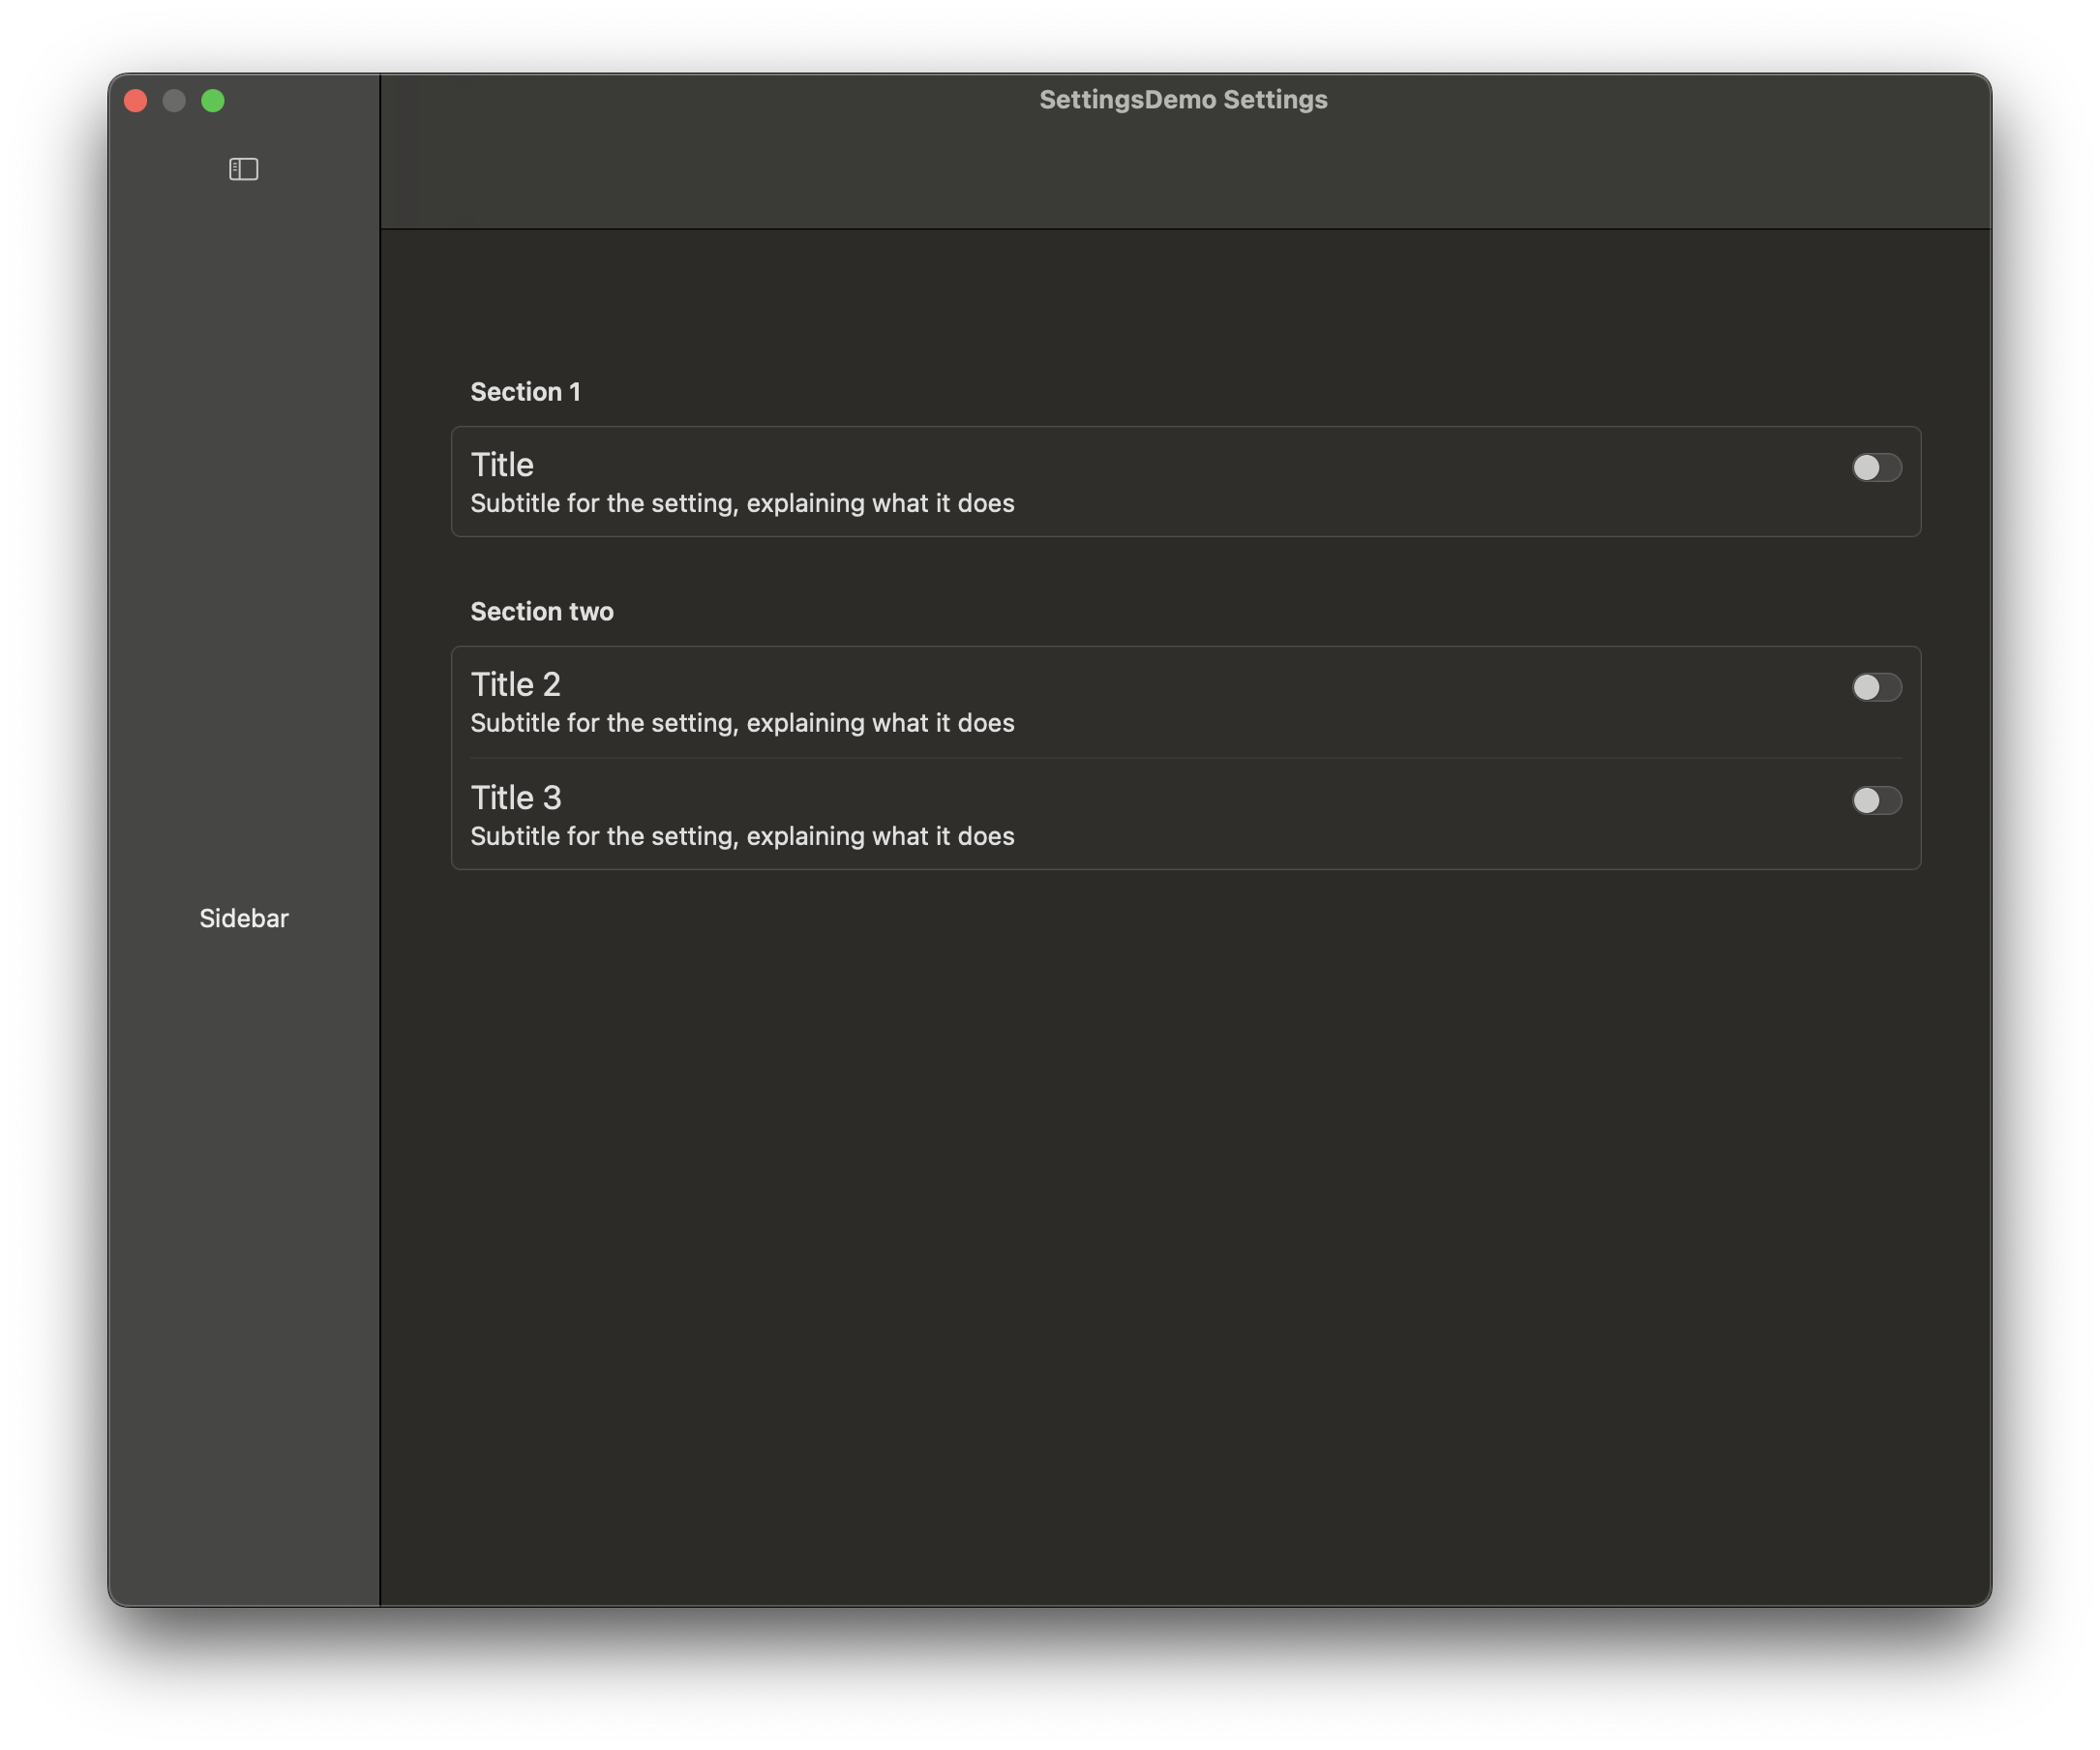
Looking at the above window, you see there are a few things that are missing for our Generic Settings View, first off… we only have toggle for now, secondly we only have one page. Lets stsrt off with making the main view. For that, we’ll add a new view called SettingsView.swift. Go ahead and add this to your project. The code will be the following:
import SwiftUI

struct SettingsView: View {
    var body: some View {
        NavigationSplitView {
            Text("Sidebar")
        } detail: {
            GeneralSettingsView()
                .padding()
        }

    }
}

#Preview {
    SettingsView()
}
And in our main App file, we change the settings view to the following:
Settings {
    SettingsView()
}
So, what did we do here?
In the first file, SettingsView, we create a NavigationSplitView with an empty sideBar and the detail view set to our GeneralSettingsView. In the second step, we set the new SettingsView to be our main view for settings, meaning that it’ll open this view when we open settings instead of the former GeneralSettingsView.
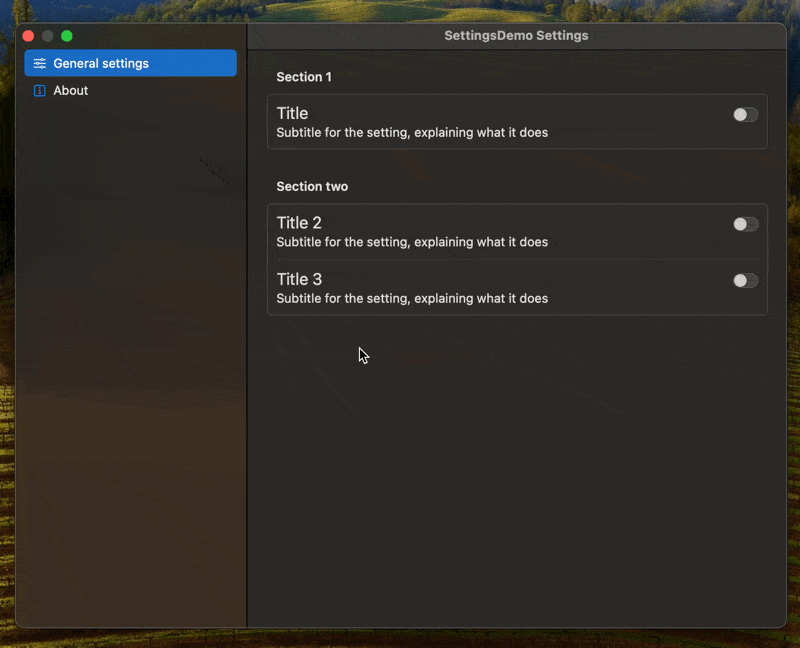
Now you should have a settings view that looks something like this:
Sidebar
Lets create our sidebar now. Lets start off with 2 pages, one being the generic page and one being an about page.
import SwiftUI

struct SideBar: View {
    var body: some View {
        List {
            Label("Generic settings", systemImage: "slider.horizontal.3")
            Label("About", systemImage: "info.square")
        }
        .listStyle(.sidebar)
    }
}

#Preview {
    SideBar()
}
This will just make a list with the two items, however running this code now will not give us any links or so. In order to do that, we need to improve our pages a little. For that we will update our sidebar to the following code:
struct SideBar: View {
    @Binding var selectedPage: SettingsPages

    var body: some View {
        List(SettingsPages.allCases, selection: $selectedPage) { page in
            Label(page.name, systemImage: page.systemImage)
                .tag(page)
        }
        .listStyle(.sidebar)
    }
}

enum SettingsPages: String, CaseIterable, Identifiable {
    case generalSettings
    case about

    var id: String {
        self.rawValue
    }

    var name: String {
        switch self {
        case .generalSettings:
            "General settings"
        case .about:
            "About"
        }
    }

    var systemImage: String {
        switch self {
        case .generalSettings:
            "slider.horizontal.3"
        case .about:
            "info.square"
        }
    }

    static var allCases: [SettingsPages] = [.generalSettings, .about]
}

#Preview {
    SideBar(selectedPage: .constant(.generalSettings))
}
And we will also have to update our SettingsView to the following:
struct SettingsView: View {
    @State private var selectedPage: SettingsPages = .generalSettings

    var body: some View {
        NavigationSplitView {
            SideBar(selectedPage: $selectedPage)
        } detail: {
            GeneralSettingsView()
                .padding()
        }
        .frame(width: 800, height: 600)
    }
}
So, what did we do?
In the Sidebar view, we added an enum called SettingsPages which inherits from CaseIterable and conforms to Identifiable. This enum will decide the pages that exist and will also define the image and name for each page.
In the SettingsView we then create a State variable and give it a default value of SettingsPages.generalSettings. This state variable we then pass on to the SideBar.
In the sidebar we then update the list to use allCases from SettingsPages and render its content. Each row that is rendered will have a tag which List then uses to set the selectedPage variable, when the user selects it. For each label, we call the computed variables from the enum.
So, why did we move the @State variable to the SettingsView instead of having it in the SideBar? We did this, because the SettingsView decides which page is shown in the detail view, which we are now going to update.
Updating the page
Now that we have the selectedPage variable in SettingsView, we can changes pages… however, we don’t have any pages to move to. Lets make a new view called AboutView.swift and add some content there. I’ve added the following code:
import SwiftUI

struct AboutView: View {
    var body: some View {
        VStack {
            Text("Demo app")
            Text("https://getclicker.app")
                .padding(.bottom)
        }
    }
}

#Preview {
    AboutView()
}
Now, go back to SettingsView and lets change pages. Lets update the detail part of the NavigationSplitView to the follwing:
    switch selectedPage {
    case .generalSettings:
        GeneralSettingsView()
    case .about:
        AboutView()
    }
Here we reference the selectedPage and dependent on the type of the enum that is selected, we render a different view.
Lets build and run, and you should have something like:
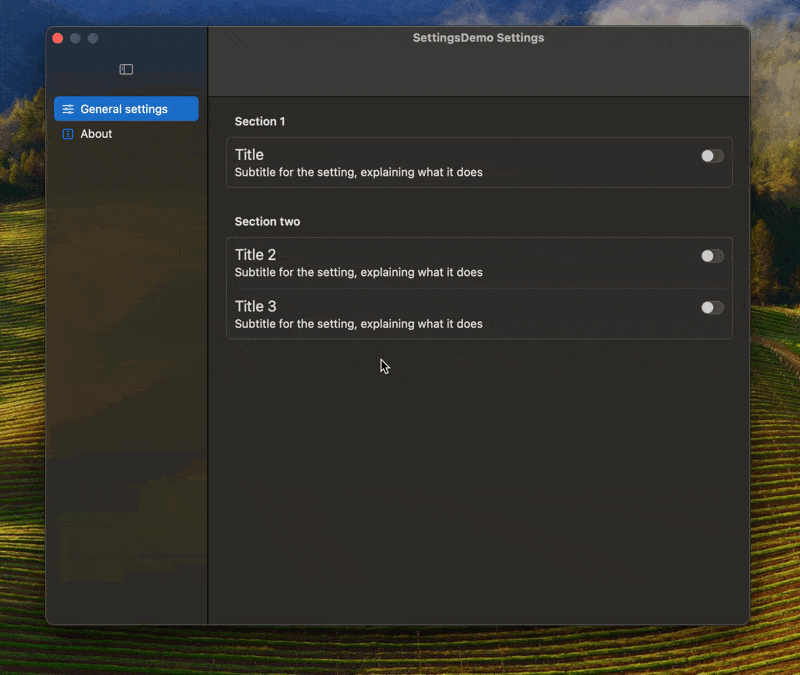
Details
Now, we have to apply some minor details to make it look a bit better.
Removing Sidebar toggle
NavigationSplitView automatically adds the sidebar toggle, lets remove this because we don’t want to show this in settings. Add the following code inside SettingsView, just below the creation of SideBar:
.toolbar(removing: .sidebarToggle)Sidebar size
As you might have noticed, the sidebar is a bit small. Lets change that by setting the width to 240. Add the following code inside SettingsView, just below the creation of SideBar:
.navigationSplitViewColumnWidth(240)This should be the endresult:
Code
This is en final code thus far. All put into one file though, so you’ll have to split it up.

